Having already created the arch for the drain, I wanted to embed it further into the wall I created for it. Although I had already decided not to use bricks to show the texture of the wall, including this on arches would be a little simpler as I could extrude the faces outwards to give the idea of brickwork that would have flowed round the drain.
Selecting all the faces, I could extrude them inwards by scaling them and again to create the illusion of brickwork. Showing the in their baser linear format would give the sharp contour of bricks that would help me keep this subtle texturing.
Using the extruded faces, I selected and moved them outwards from the model to create each individual brick. As the bricks in this model would not be laid the same way as regular bricks, this works quite well. Looking at the wall model for instance, having this technique used would mean all the bricks would be aligned, and structurally it doesn't make too much sense.
I did the same with the inside lip to give a bit more on an interesting look. As I wanted to create a grate this would help later on.
At this point I wanted to crate a hole in the wall for the drain to fit. I combined them and tried to isolate the face, which unfortunately did not work. I tried using Maya's booleans, but not having experience with them, I did not really know which direction to head with them. Knowing what I wanted to create would help with my deduction of tools.
I went back to the Maya forums and looked up how to cut out faces from different objects. Many of the questions posted were slightly different to my own, but it did seem as though I was heading in the right directions working with booleans. Because of this, I went back into Maya and messed around a bit more.
As I worked with booleans, I soon realised that, much like Adobe Illustrator, using two objects that will intersect, after cutting them away, the objects disappear. In that if you were to place a cylinder on a cube, after using the cutting tool, you would be left with a new shape entirely. Because of this, I duplicated my drain for later on. Knowing it would be deleted in one of the processes, I wanted to have another to use in the new place for the hole.
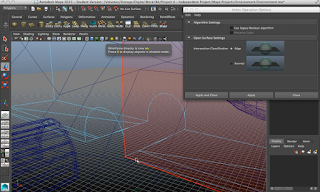
The first boolean I used was Union. As in the picture below, it has completely removed the section I wanted. This would have been great if it wasn't for the shape it left behind.
The shape left behind was a completely hollow shape with no geometry to it. As below, the hole it being held open by an unreinforced curve. Because of this I tried another.
Using the difference function gave me what I needed. There was a new geometry inside, as well as the faces I could delete on the outside.
Removing the faces from the bottom section allowed me the space I needed to move the drain into place.
Much like before, I came up against a similar issue. Where I had used the boolean function, the object had turned green.
From my experience before, I knew this was easily solved and that the object had just lost it's default material.
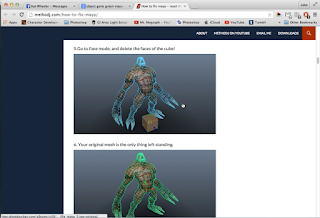
Wanting to be sure I was doing the right thing, I looked back over the webpages I had used before and followed the same process I used with the characters face.
Creating a new cube and grouping them should have left me being able to assign the current cube material to the wall.
After combining, the material assignment didn't actually stick. Because of this I had to try another option, being exporting the objects as a whole and reimporting it in place, hoping that it would reassign it the material.
Exporting and reimporting the selection is obviously a lot more of a long winded way of doing things, but in this instance it worked. Following along with the tutorial on the website, I managed to reimport the object in the same place, giving it the default material type in the process. Not only this, but with reimporting it both the drain and the wall had been merged together, allowing me to now have this wall with the drain in place as one complete object.
With the drain now in place, I wanted to create a grate that would cover the drain and not allow creatures in. Using a polycylinder, I increased the height and and decreased the radius to give me a fairly realistic bar shape. Using the duplicate command I could move the new object over, then using the duplicate again command it would create a new object, but with the same transform properties as the original.
Using this tool I could create the basic vertical poles for the grate.
Duplicating and rotating one of the existing poles, I could then begin work on the horizontal ones. Using the same tools as before, I could move the pole into place and begin duplicating.
Creating a rather oversized grate was not so much of an issue as it could be scaled together to fit. Also, because of the ground plane I had made, I could move the grate into place using the plane as the 3rd edge for the poles to sit against. Having the freedom to move the poles sticking through underneath would save me a lot of time as I wouldn't have to match up all the points exactly when positioning it.
Lining up the grate with the lip I had created earlier proved to be the most challenging thing. Using the wireframe mode to sit it in position allowed me to see the construction of the whole object. This is by far the most interesting object I have created so far. Looking at the model as it is progressing, I can see the knowledge I have gained growing and allowing me to play more within the work. Because of this, although I don't think going into the Unity Engine is practical anymore, I do think this is the career path I will end up pursuing. From the short time I have had to work in these types of software, I have been inspired, motivated and challenged during the entire process. This in itself is something I feel is very necessary for me in a working environment. When moving onto my professional practise, I will bear this in mind and follow my progression and approach to companies accordingly. Without challenging myself through this project I would not have realised my love for 3D form and the artwork that can be created. So far this project has pushed me further than ever before, but i'm so very glad I took the leap.


No comments:
Post a Comment